
The question of adding solar power for us was more a question of when then it was why. We know we want the flexibility to completely unplug when we hit the road fulltime. The entire restomod process of our 1975 GMC Motorhome Eleganza 2 has been focused on efficiency. Everything must have more then one purpose – the televator cover doubles as a work table, the bed is built on a platform to provide storage underneath. Even the seats in the cab swivel to add seating to the living area. Having several methods to charge our batteries and run the ‘house’ is just as important. While there are wind turbine systems for an RV, we feel solar is the way to go for us.
When we purchased (and installed) our inverter charger we made sure it was capable of handling input from solar panels. Thanks to Youtube videos by Will Prowse (I recommend watching his videos, they are thorough and designed for those with no knowledge to you who may have a good understanding of the process and variations), we decided on a simple yet efficient system for our particular needs.
We purchased
Two 100 Watt Richsolar poly-crystalline 12 v Solar Panels
Renogy Solar Panel Roof Drill Free Mounts
Epever Solar Charge MPPT Controller
All Powers MC4 Connectors
3M VHB Tape RP 32 .5 inch
The new cables from the two 6 volt batteries were run through the battery box, under the bed platform and in front of the wall behind the closet to the Epever Solar MPPT Charge Controller. We installed the controller in the bottom cabinet next to the closet where the converter we previously removed had been.


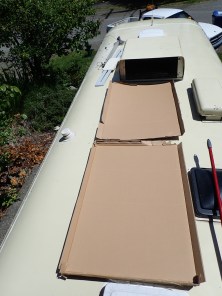
Next on the list to prepare for the installation was to clean the roof and then lay the boxes that held the panels to be sure they would fit where we hoped. We were happy that the two solar panels would fit between the air conditioner and back room MaxxFan vent cover. The side vents are far enough from the center that they are not in the way. We then lightly sanded the area where the mounts would be taped (we went with a drill free system) and cleaned it with rubbing alcohol. We thought we would have to modify the mounts because of the curve of our roof but the panels fit perfectly in the center.
Then it was time to go back inside the rv,. We cut a round hole into the pipe that is used to vent the kitchen sink. This vent pipe is located behind the drawers and cupboards next to the closet in the hallway. Once the hole was drilled, up to the roof he went to feed first the positive solar cable, which we marked with green tape so we didn’t confuse it with the negative cable. I was able to get a hold of the cable and pull it through then the negative cable too. We pulled the drawers out about an inch and a half and were able to feed the lines all the way down to the controller.


We stopped for my grandson’s (the tv installer from a previous post) and my birthday dinner – lovingly hosted by Danny and Kim. The Uber driver took us through Seattle’s new tunnel – I’m sure he thought we were crazy as we cheered since none of us had been in it yet! Dinner at the Melting Pot was fun and while our waiter may have been a bit off his game (??) it added to the entertainment of the evening and we all had a great time.

Okay – back to business! We did have to trim nearly 1/2 an inch off one mount to fit next to the MaxxFan cover. Although the mounts are drill free, we felt better screwing the panels into the mounts in addition to a layer of the 3M tape. We adhered the tape to the mounts that would stick to the roof then it was back on the roof where I carefully handed off the first panel for him to place and PRESS down. Then the second panel. That tape is so strong, luckily we got the panels where we wanted them on the first try! We did create a cable to attach one panel to the air conditioner frame and the other to the vent frame – just as a back up, if one were to get loose it will slap around on the roof but not fly off and hit another vehicle.


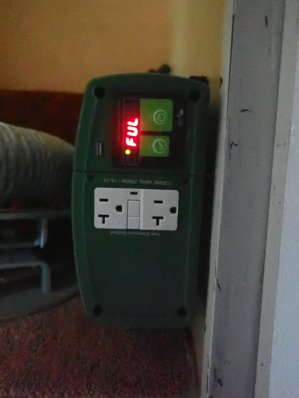
Attaching the All Powers MC4 connectors was not difficult. We had strung the cables under the cap of the vent so no modifications were necessary. Back down the ladder and everything is plugged in. We decided on a spot to install the monitor – it, too, was able to have it’s cables strung behind and next to the drawers, keeping drilling new holes to a minimum. How happy are we that the panels were providing power immediately. It was getting late in the day by the time we were done so there wasn’t much sun left but we still had positive readings.


#DIY #GMCMOTORHOME #Eleganza2 #Solar @WillProwse #Retirement #RVliving #offgrid #wedidit #EpeversolarchargecontrollerMPPT #installyourself #Iamanexpertnow #makeitwork #youcandoit

Why did you only use 100 watt panels when 400 watt panels were available?
LikeLike
At this point this is all we need.
LikeLike